

Maisie Lloyd
Maisie is the Digital Content Manager at Intelligency, handling all things creative for the agency. Her experience centres around the production of digital content, pertaining to graphic design, writing copy, and video and audio content.
What is Basecamp, and why do we use it?
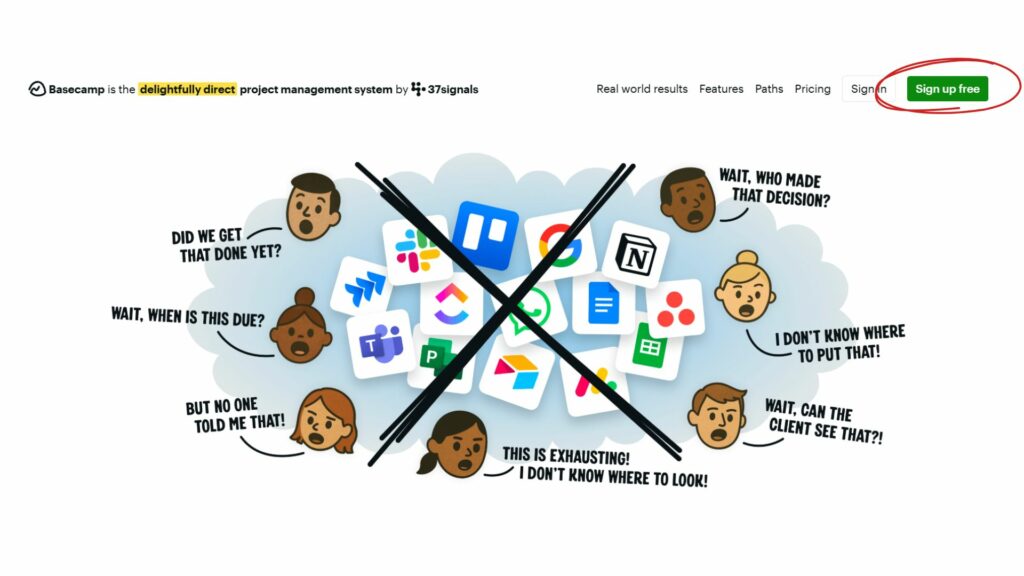
At Intelligency, one of our preferred software tools to use is Basecamp. Basecamp allows us to create, monitor, discuss and complete projects with complete visibility for the client.
There are many benefits to using Basecamp. It can make project tracking simpler, especially across organisations. Being able to set to-do lists, create different project folders, and enable commenting are all features that make the collaborative process easier.
How to set up an account with Basecamp
Whether you’re launching your Basecamp account for the first time or you’ve received an invitation to a project, you may be wondering what you need to do to create an account. Well, that’s simple:
Creating an account
Step 1: Go to the Basecamp home page and navigate to “Sign up for free”.
You’ll see a pop-up which will show you the various subscription models. For those who have been referred by their agency, don’t worry about this step as the agency will have taken care of the subscription and master account creation.
Step 2: Provide your details, which include your name, email and organisation name. Then you’ll need to set your password.

Familiarise yourself with its interface.
Basecamp is very easy to navigate once you become familiar with its interface and how the software functions.
Once you’ve logged in, you’ll be on the ‘All Projects’ page. This page contains all the various project folders. It’ll provide a time update beneath each project to show when there was last activity on it, as well as icons for all the contributors on the project.
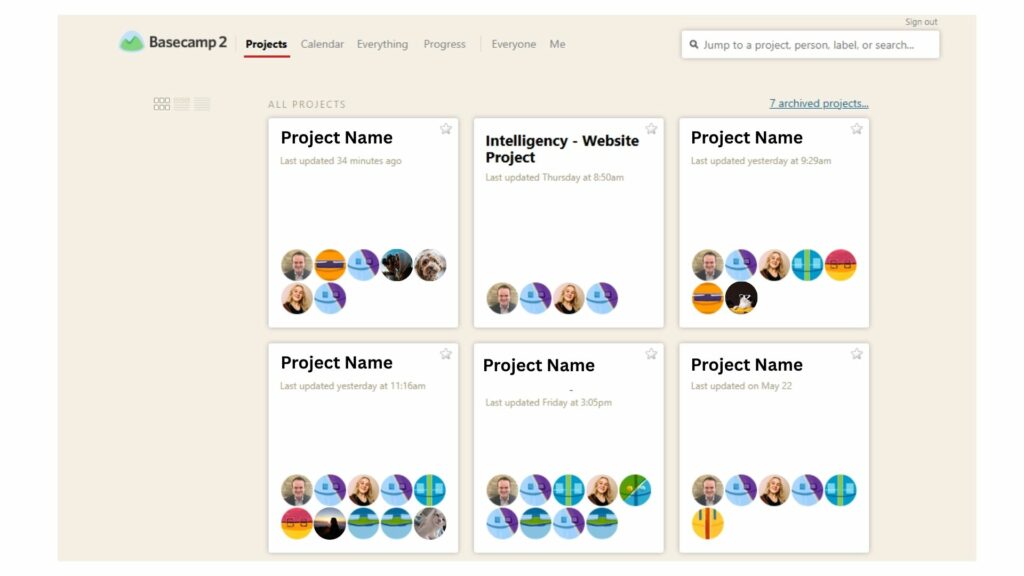
To look at a particular project, click on the project card. This will then take you to the project page.
What’s on the project page?
Navigations and discussions
When you get onto the project page, you’ll see the header bar and navigation, which allows you to easily click on the item you want to focus on. In the navigation bar there is, the discussions, to-dos, files & documents and events.
In the top right-hand corner, there’s an invite button which allows you to invite new contributors to the project. Beside the invite button is the catch-up button, which allows you to have a look at the latest actions across the project.
Below is the ‘latest project updates’ section, which itemises and dates the activity on the project. Beneath this is the ‘Discussion’ section, which pulls all the latest comments from the project into view. This feature can be particularly useful when you’re unsure which to-do you’ve commented on.
You may notice an archive project button in the top right. This is a place where all previous projects that have ended can be safely stored for later access. It’s worth mentioning that free accounts cannot archive projects, and once a project is deleted, it cannot be retrieved.
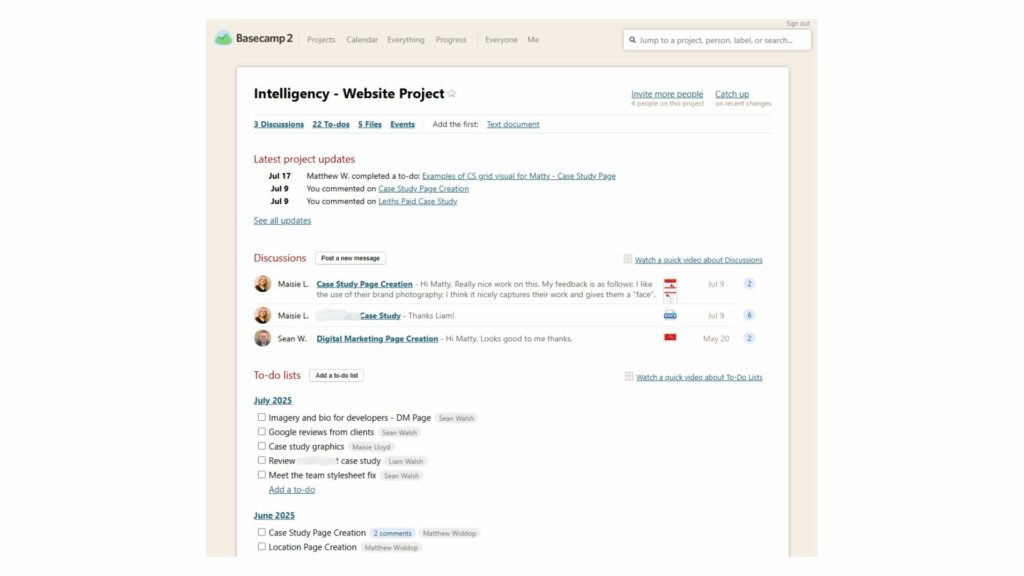
The To-do list section
The To-do list section is really where it’s all happening on the project pages. This is where you can create lists with action points which can be dated, assigned to a contributor, and commented on.
Besides the to-do-list title is the ‘add a to-do list’, which is how a list begins. In our business, we take the approach of labelling them by the months; that way, we can track what’s going on month-by-month.
The itemised tasks on the to-do list can be dragged and dropped into different positions in the list, and to different to-do lists on the page. Meaning any delays or postponements can be reflected in the project.
Adding, editing & removing comments
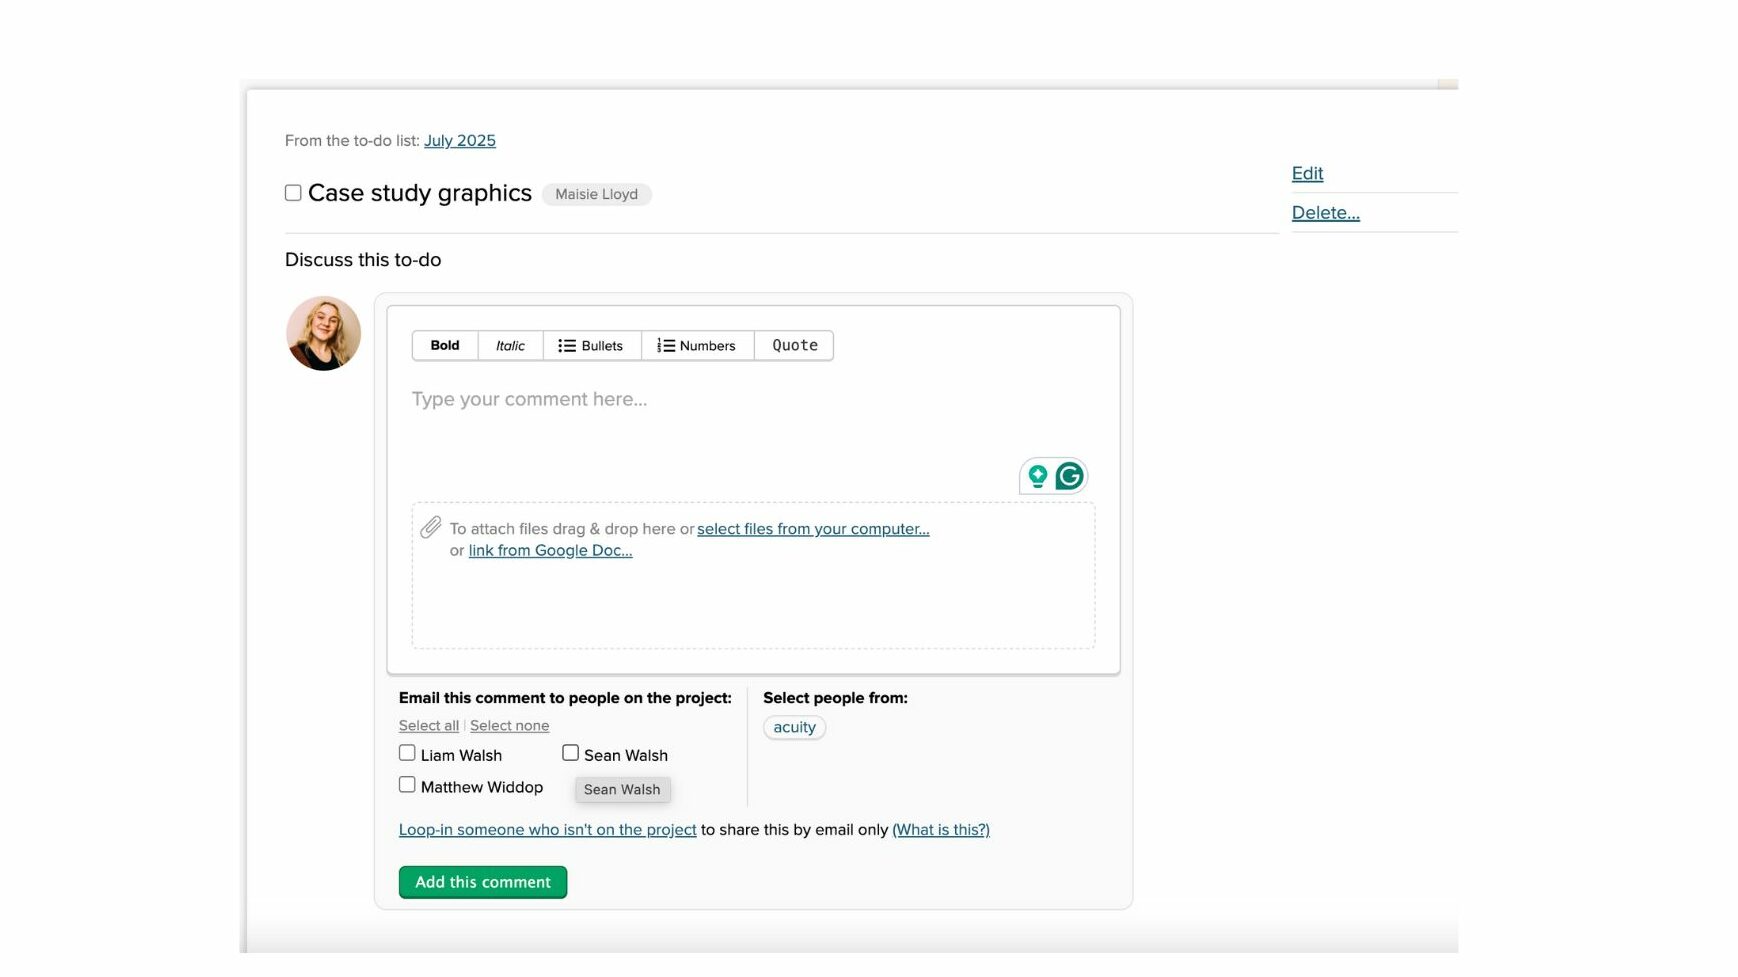
To add a comment to a task, simply click on the text, and it will take you to a window where the task is expanded. Beneath, comments or files can be added on which is particularly handy for communicating with clients about a task.
In the comment section, there are some formatting options like numbers and bullet points to help keep any discussions structured. When you’re adding a comment, it will allow you to email and loop in project collaborators. If you need this to be seen by a client or team member, make sure to select their name in this box.
To add a file to your comment, you can click Add File or drag and drop onto the comment box. Tip: best practice is to label content as Year/month/date/ – client name – file/content title – your initials.
Comments can only be edited within the first 15 minutes of sending them. You can edit a comment by clicking edit just below the comment. This will bring the comment box back up, allowing you to perfect your comment.
The way to delete a comment is the same as editing; comments need to be removed within the first 15 minutes of the comment being added.
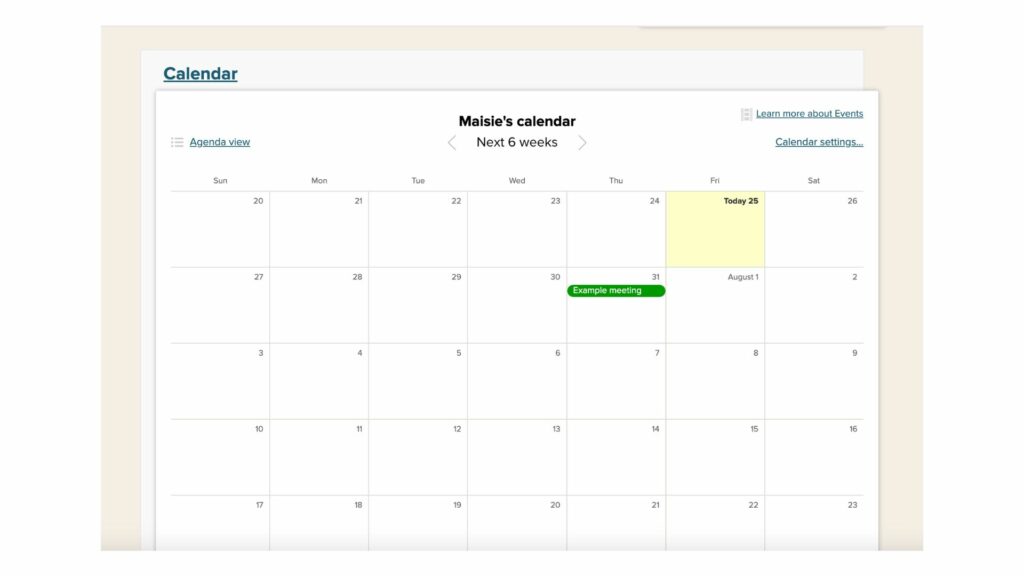
What’s on the calendar page?
The calendar page is very self-explanatory. It includes a 6-week calendar where you can add in specific tasks. This can be particularly handy for bigger teams wanting to check what’s going on across the month without funnelling through the to-do lists.
On the calendar page, you can create multiple calendars, allowing you to track by client or project on there. To add a calendar, navigate to the top left corner and click on Add a Calendar. Create a name and invite the members you’d like to be able to view or add to the calendar.
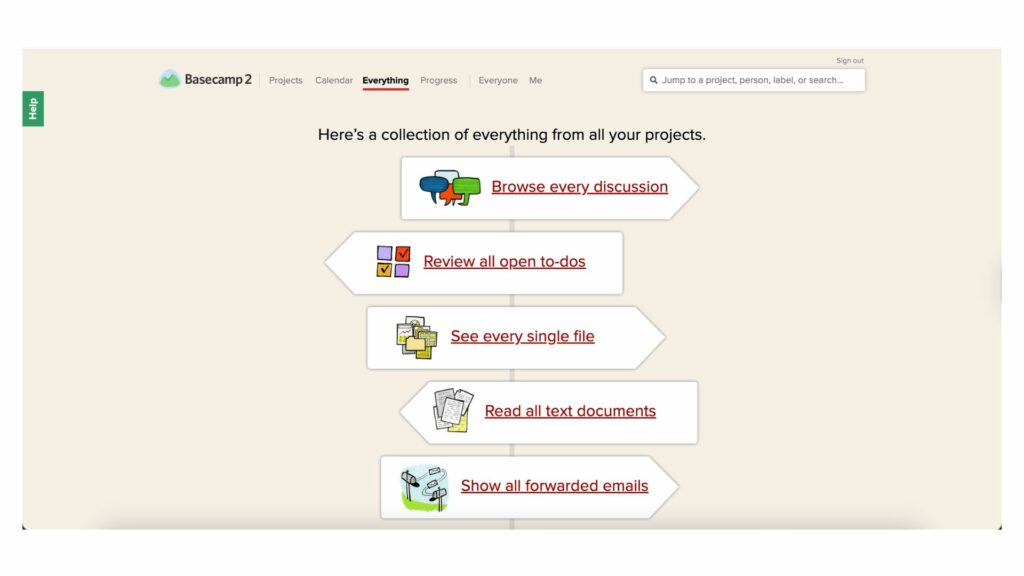
What’s on the everything page?
This page gathers every single comment, to-do, and file on your Basecamp. All this collated information can be particularly handy when you’re unsure where to retrieve information from, which you know has been on your Basecamp.
What is on the progress page?
The progress page aggregates all the actions and comments created on Basecamp and orders them onto a timeline, allowing you to assess the progress of a task/project on a granular level. This includes times, any discussions, any files and the project name.

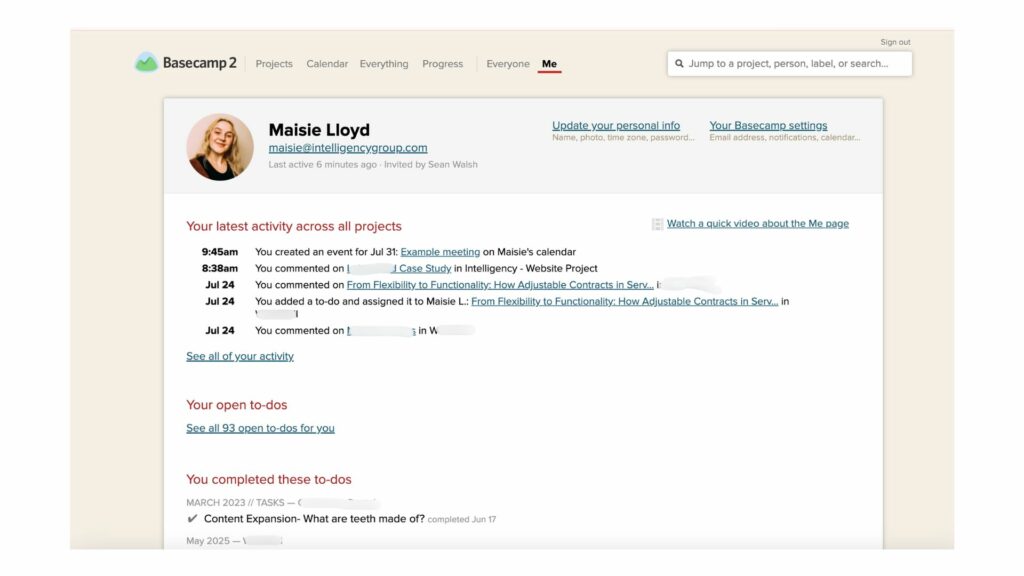
What is on the Me page?
On the ‘Me’ page is essentially your profile, collating all of the activity for just you. This will open up a page with your profile, all your comments, activity and discussions you’ve specifically contributed will be compiled here.
This is useful for cutting out the noise from other contributors and project tasks, allowing you to see all the work you’ve done specifically.
How to adjust my notifications on Basecamp
Select ‘Me’ on the navigation bar. In the top left-hand corner, you’ll see ‘Your Basecamp settings’ hyperlinked. Click on this to open your Basecamp settings. Here is where you can adjust your notifications to your preference, with the ability to adjust:
- Which projects do you get notified of
- How frequently you’ll receive emails, i.e. if you want an email per action, or you’d prefer to have a summary email.
- If you’re notified when someone else completes a task
- If you want a daily summary email
- What email address are emails sent to
Basecamp Etiquette
It’s good practice to make sure you’re using Basecamp to help organise, track and provide context when needed. For instance:
Keep your discussions organised by task and topic. Comment under the applicable task for easy monitoring rather than other tasks out of convenience. In the long run, this will make finding comments and tracking that task simple and not confusing.
Tag only the necessary people. To avoid bombarding inboxes with Basecamp emails, make sure to only loop the necessary contributors into the content. If their input is not required, it’s unnecessary to loop in everyone.
Avoid creating multiple to-dos for the same tasks. This is an important one; it ensures all the information, like files and feedback, is submitted to the right comment section. Ultimately, reducing the time spent swapping between tasks only to gather information that could have been collected in one comment section.
Using comments instead of email. Because comments are already emailed to the contributors you’ve selected, cut out the additional admin of writing emails. Keep communications all on one channel, like Basecamp, to avoid overcomplicating the process.
We’d love to know if this guide has been useful for you. Let us know!